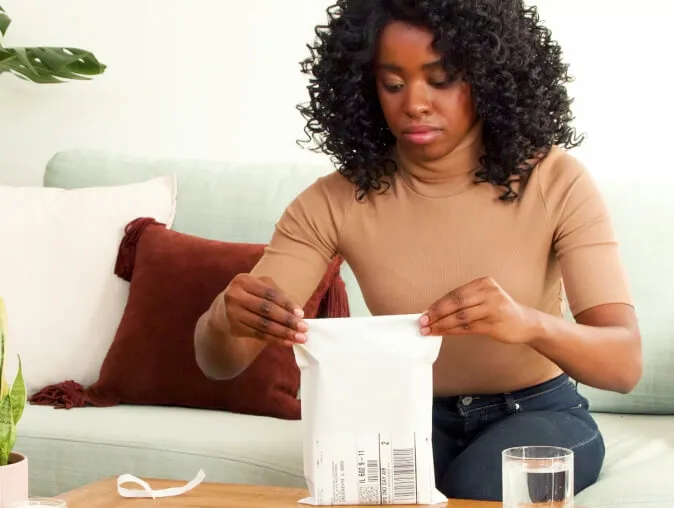
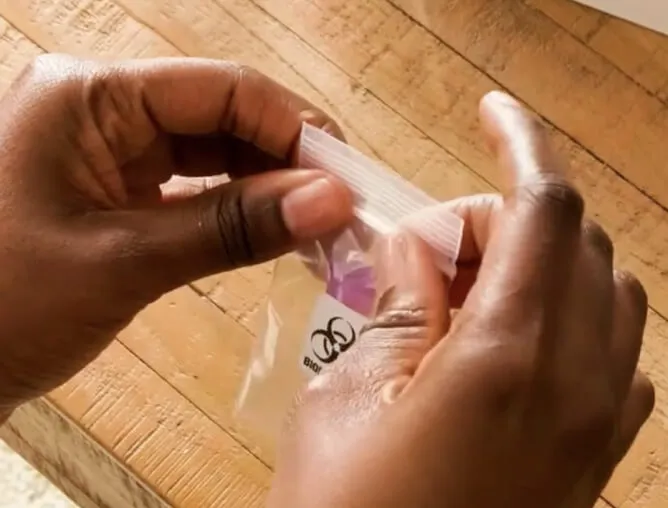
Welcome to Pulse Virtual™

Your preventive benefit identifies risks, improves habits, and gives you long-term control over your health, all from the comfort of your home.

Here's What's in Your Lab Kit

Actual kit components may vary in shape, brand and color. Missing anything? Email memberservices@ehe.health and we’ll get to the bottom of it.
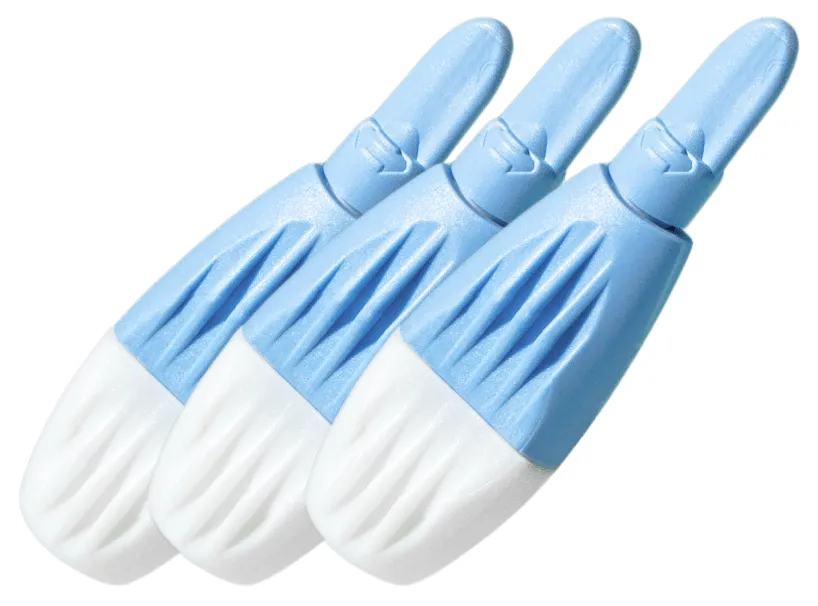
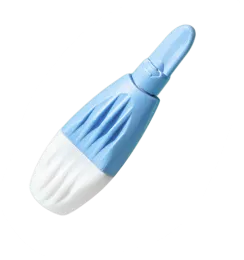
Lancets
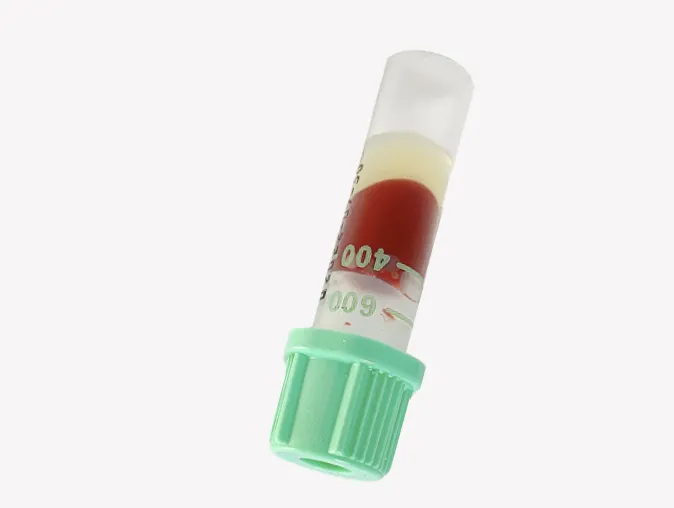
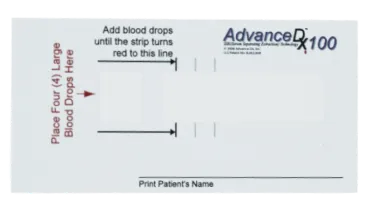
Collection Device
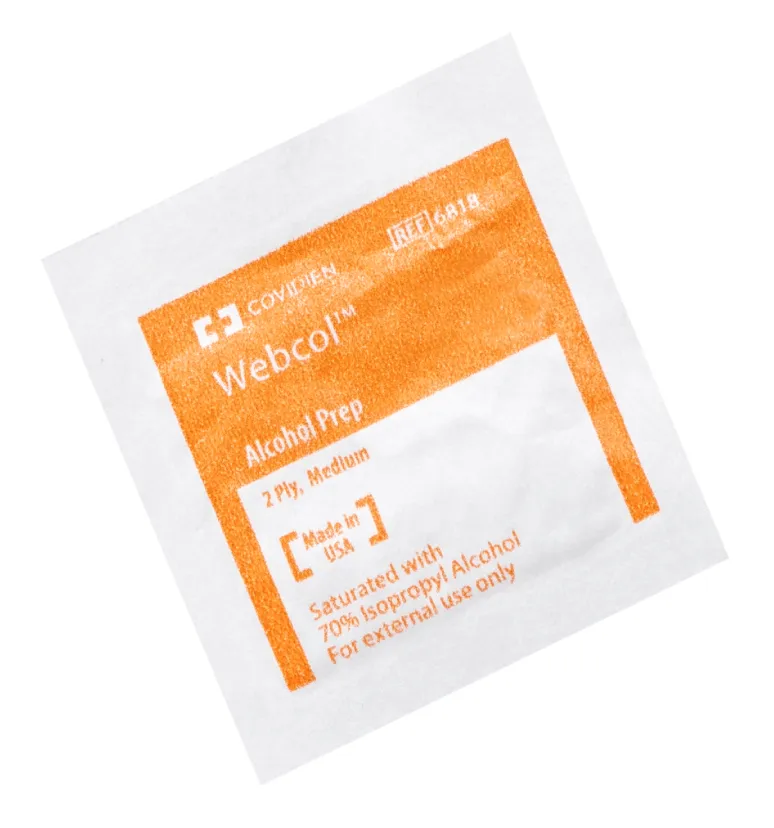
Alcohol Pads
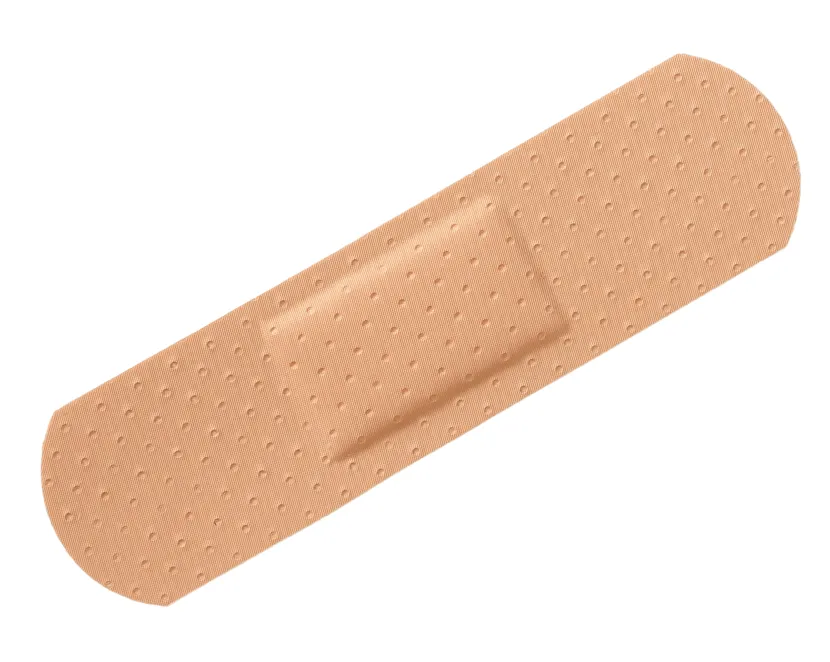
Bandages
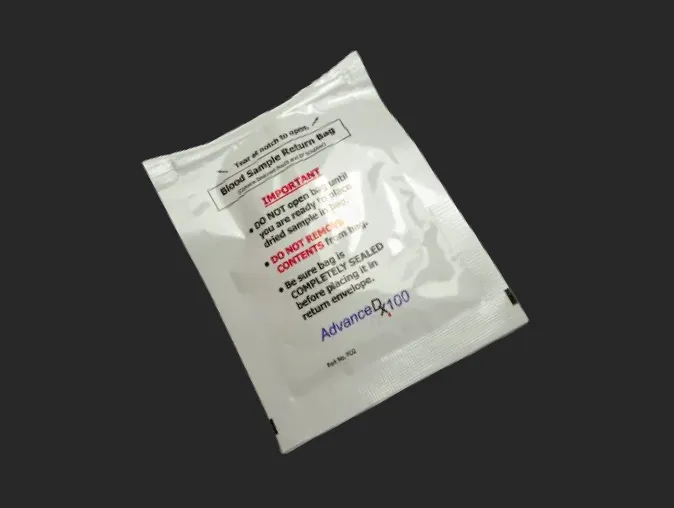
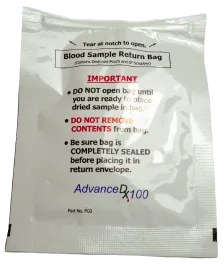
Sample Bag
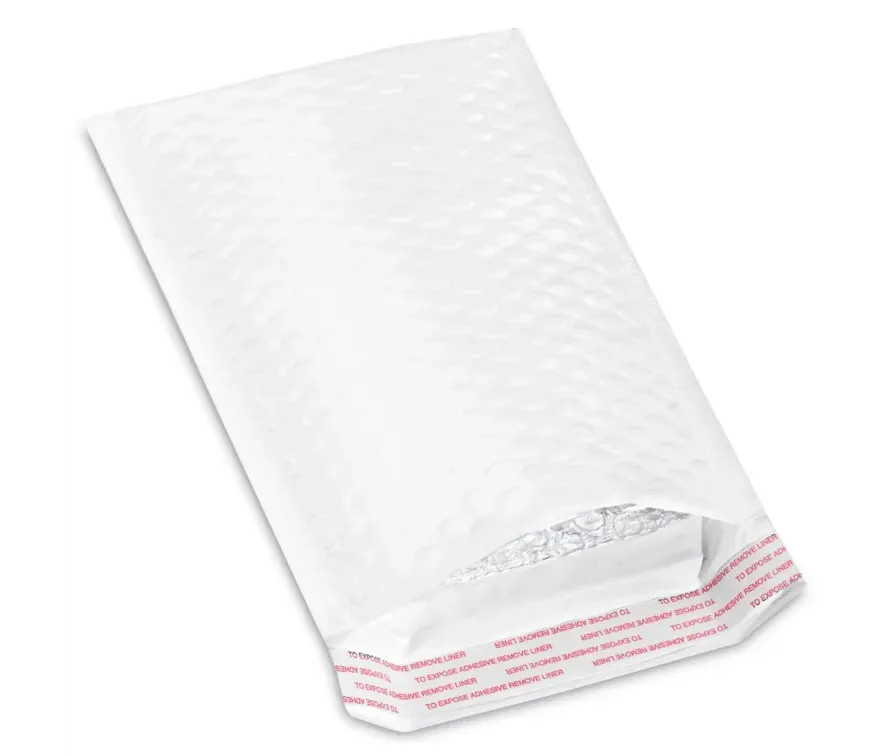
Return Envelope
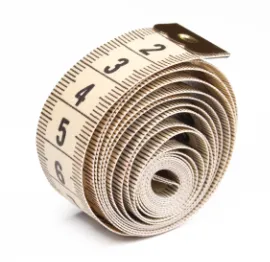
Tape Measure
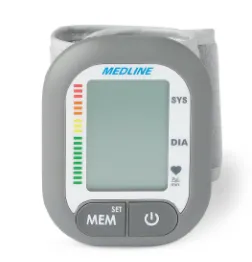
Blood Pressure Cuff
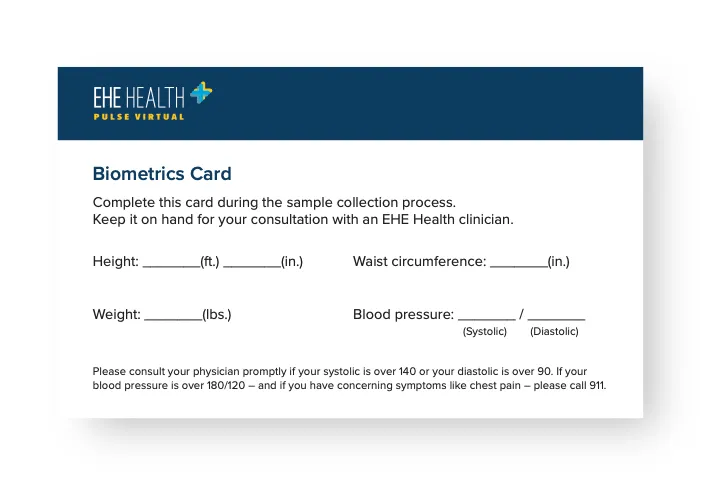
Biometrics card

4 Simple Steps to Better Health

We’ll walk you through every step of the sample collection process.

1

Measuring Blood Pressure >

  1. Roll up your sleeve to expose the skin. Apply the cuff to your wrist with your palm and the display facing up.
  2. Fasten the cuff around your wrist, leaving no extra room between the cuff and your skin.
  3. Sit upright with both feet flat on the floor, elbow on a table and wrist at heart level. Turn your palm upwards and take 5-6 deep breaths.
  4. Rest for 5 minutes before measuring.
  5. After 5 minutes, press the power button to begin the reading.
  6. For a meaningful comparison, try measuring under similar conditions. For example, take daily measurements at approximately the same time, on the same wrist or as directed by a physician

For issues or questions regarding readings, contact Member Services at 800-362-8671 or MemberServices@ehe.health

2

Obtaining Blood Sample >

  1. Before the test, hydrate with 16 oz. (two full glasses) of water to help with blood flow.
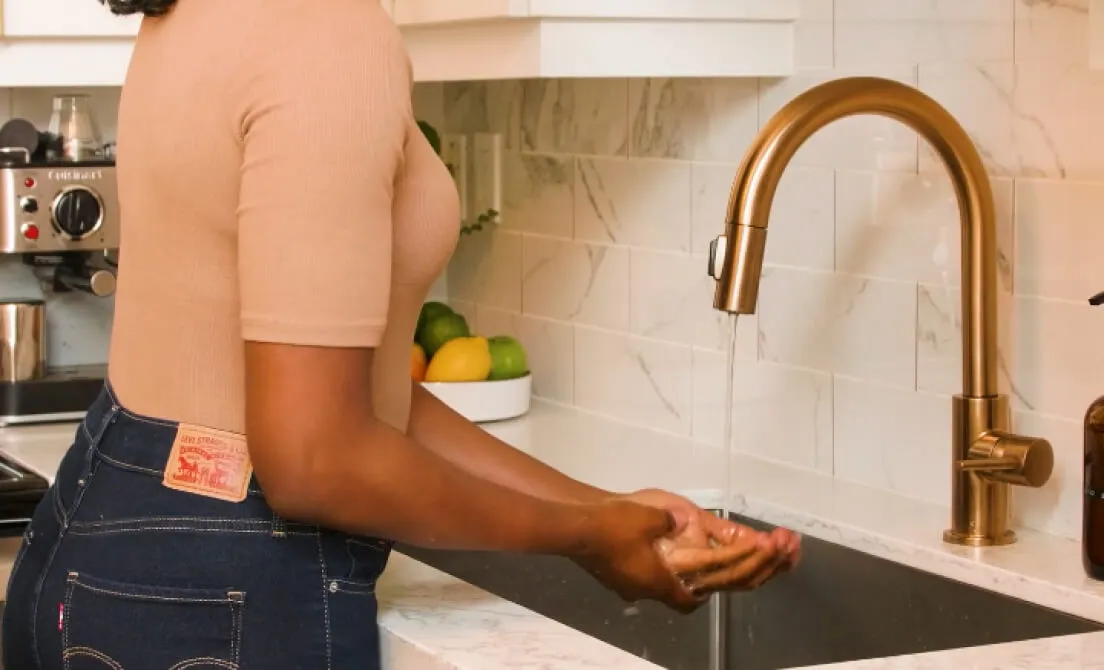
  2. Heat your hands to get the blood flowing to your entire hand and fingers. You can do this by warming your hands under warm water for one minute.
  3. Move your body to get your blood flowing even more. We recommend two minutes of exercise—jumping jacks, squats, high knees, or whatever you’re most comfortable with. If you have a smart watch or heart monitor, we recommend getting your heart rate above100 beats per minute.
  4. Time to prepare to prick your finger. We recommend using your ring finger as it is usually the least calloused. Wipe your finger with the provided alcohol swab. Remove the collection device and place it face up on the table, ensuring you don’t touch the collection material.
  5. Twist and remove the cap on your lancet.
  6. Apply the lancet on either side of your finger, pressing it into the skin until you hear a click.
  7. Massage (don’t squeeze) to increase blood flow.
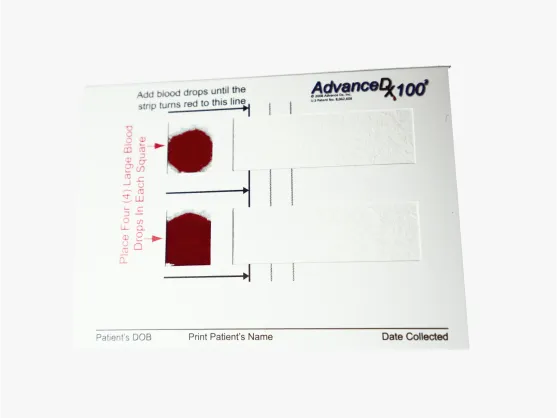
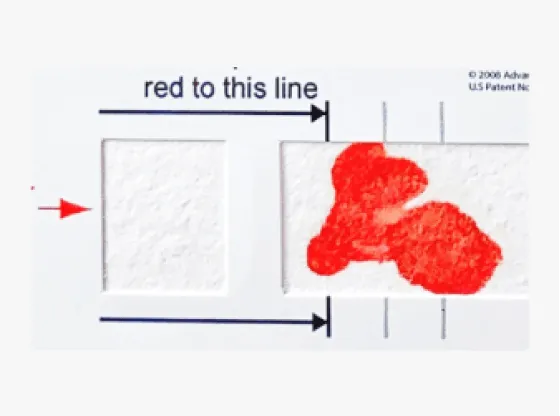
  8. Drop your blood onto the square indicated on the collection device. Fill the collection device to the first line indicated on the strip.
  9. Allow your sample to air dry for two hours on a flat surface before placing in the foil envelope.
3

Measuring Waist Circumference >

You’ll need to measure your waist circumference for a questionnaire later in the process. Follow the CDC’s guidelines for an accurate waist measurement:

  1. Stand and place a tape measure around your midsection, just above your hipbones.
  2. Make sure tape is flat and horizontal around the waist.
  3. Keep the tape snug around the waist, but not so much that it’s compressing the skin.
  4. Measure your waist just after you breathe out and take note of the measurement number.
4

Record Biometrics >

Fill out the Biometrics Card included in your lab kit. Do not ship this card, you will use it during your consult with a clinician.

Shipping Your Samples

Your kit contains a prepaid shipping label and courier instructions. Drop off your completed home test at the nearest USPS location on the same day you take your test. (You can view USPS drop-off locations and hours here.)

In 2-3 business days, the lab will receive your sample. Then, we’ll email you when your results are available and ready to review with an EHE Health clinician.

Preparing for the test

What's in your kit

Actual kit components may vary in shape, brand and color. Missing anything? Email support@imaware.health and we’ll get to the bottom of it.
Lancet (x4)
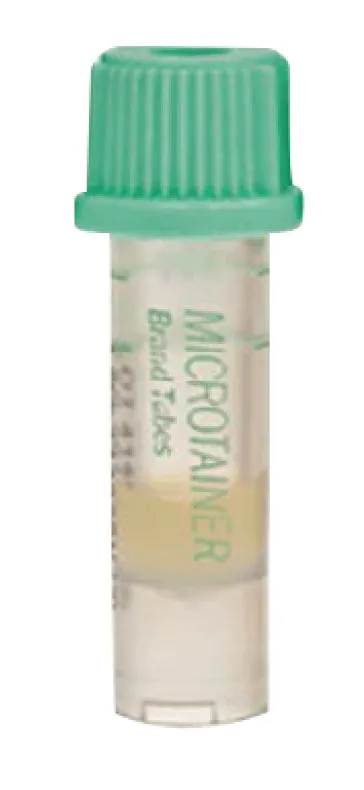
Microtube (x1)
Alcohol pad (x4)
Bandage (x4)
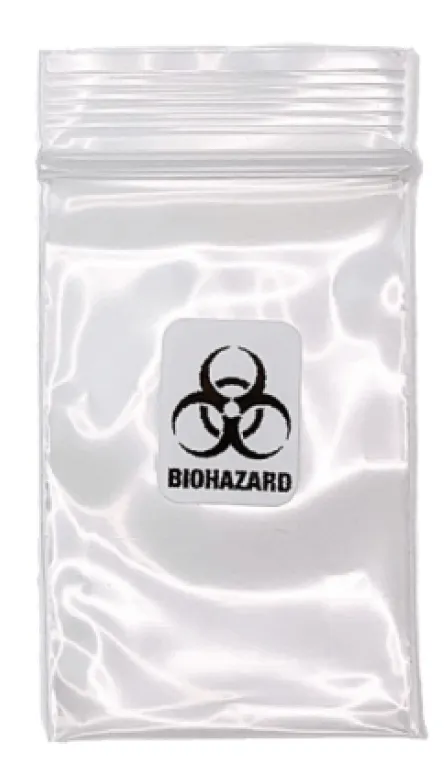
Biohazard bag (x1)
Sample bag (x1)
Return envelope (x1)

Here's what's next

We’ll walk you through every step of the sample collection process.

Continue to hydration

Preparing for the test

First, let’s get you hydrated

We want to make sure you are well hydrated prior to taking the test. This will help with blood flow when you collect your sample.

Please drink 16oz (or two full glasses) of water.

Now that you're hydrated

We’ll offer some hand warming tips to open up your capillaries.

Continue to hand warming

Preparing for the test

Now, let’s get your hands warmed up

Ensure your hands are warmed up as much as possible. Warm water will help open up your capillaries and get your blood flowing.

Run your hands under warm water for one minute.

Feel free to use our one-minute timer.

All warmed up? Good!

Next, you’ll get a quick exercise in to ensure your blood flow is as optimal as possible.

Continue to exercise

Preparing for the test

Time to get your blood flowing

Do some moderate exercise for two minutes. We recommend doing some quick jumping jacks, but do whatever exercise you are comfortable with. If you have a smart watch or a heart monitor, we recommend getting your heart rate above 100 beats per minute.

Try one (or more) of the following exercises:

1 minute of squats
2 minutes of jumping jacks
2 minutes of high knees

Feel free to use our two-minute timer.

You’re nearly there

Now it's time to prepare your finger for the sample collection.

Continue to preparation

Preparing for the test

Before you prick your finger

Let’s prepare to get the best results possible.

You will need to do the following:

  • We recommend using your “ring” finger as this finger is usually the least calloused.

  • Wipe your finger with the provided alcohol swab.


  • Remove the microtube cap.


  • Twist and remove the cap on your lancet. It is now ready to use.

Once you are ready

We’ll show you how to collect your sample.

I am ready to use the lancet

Taking the test

Now apply the lancet

Be patient and take your time! This process should only take a few minutes.

You will need to do the following:

  • Apply the lancet on either side of your finger.


  • Press the lancet into your finger until you hear a click.


  • Massage (don't squeeze) your finger to increase blood flow.

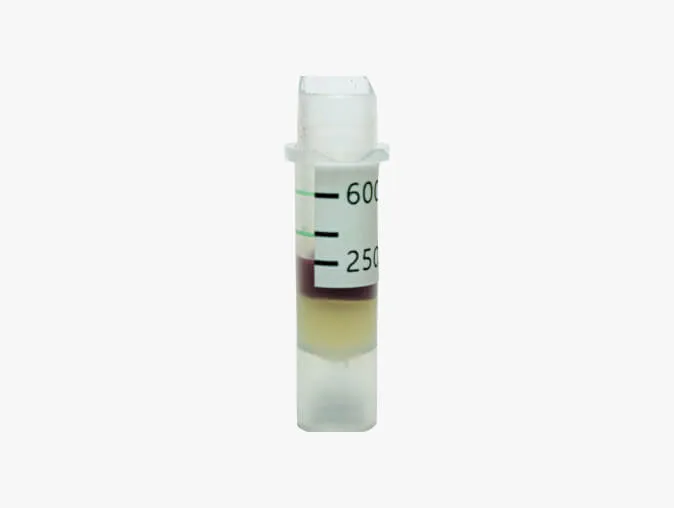
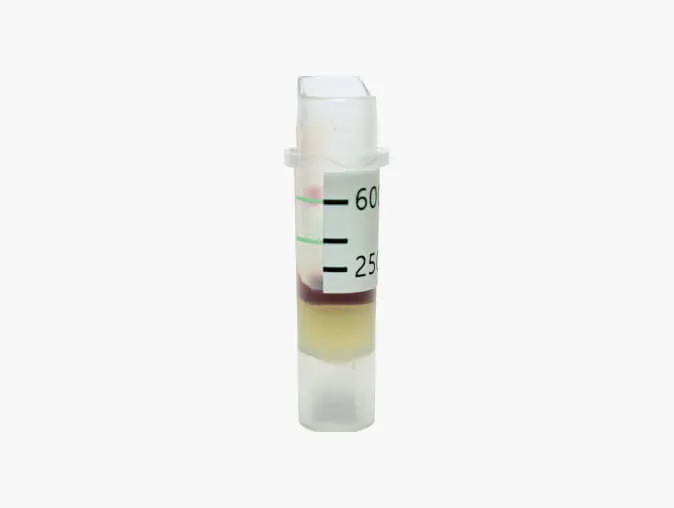
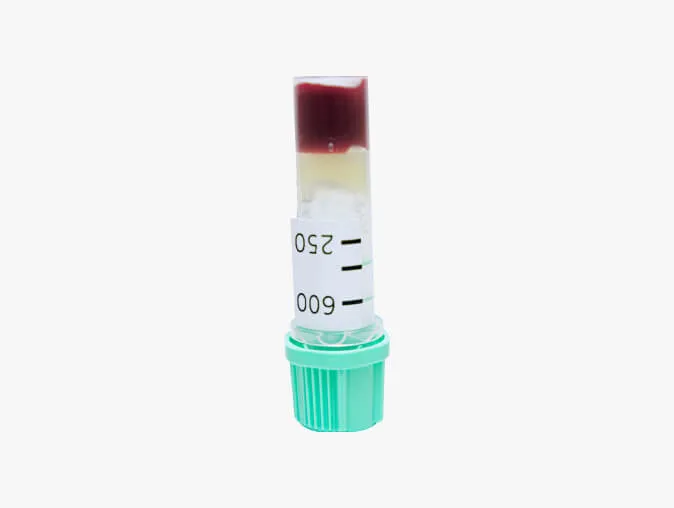
Here is what to look for

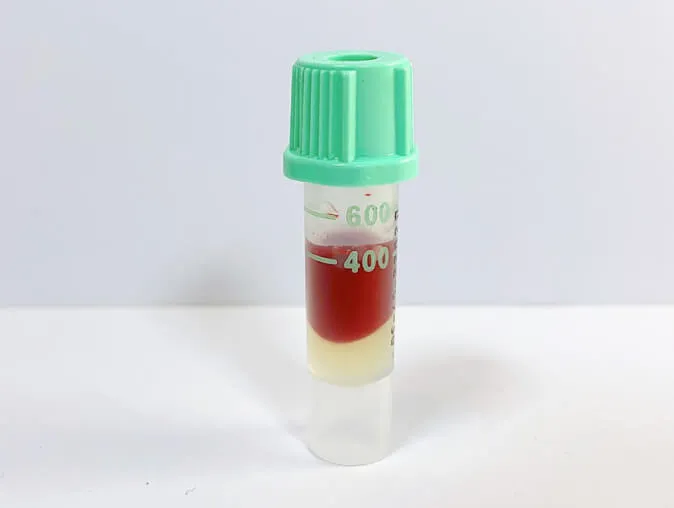
Your test requires 250 microliters of blood (fill to the line indicated on your microtube)

Perfect sample

An ideal sample will be filled to the 250 microliter line.

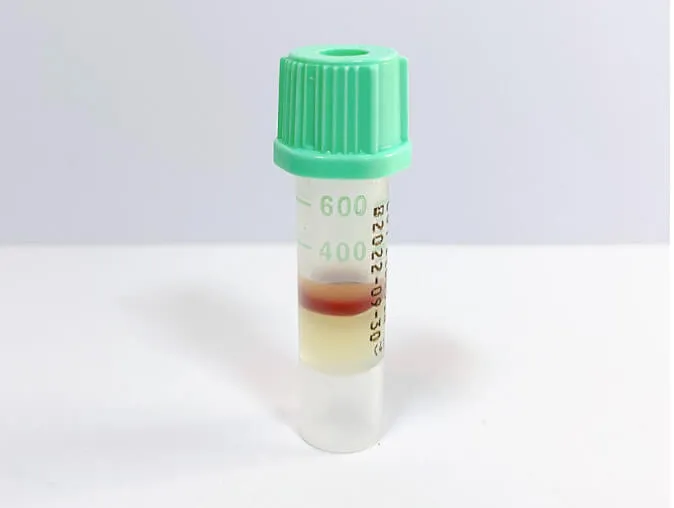
Not enough blood

Massage (don’t squeeze) a few more drops from the base of your finger to your second knuckle. Use another lancet, if needed.

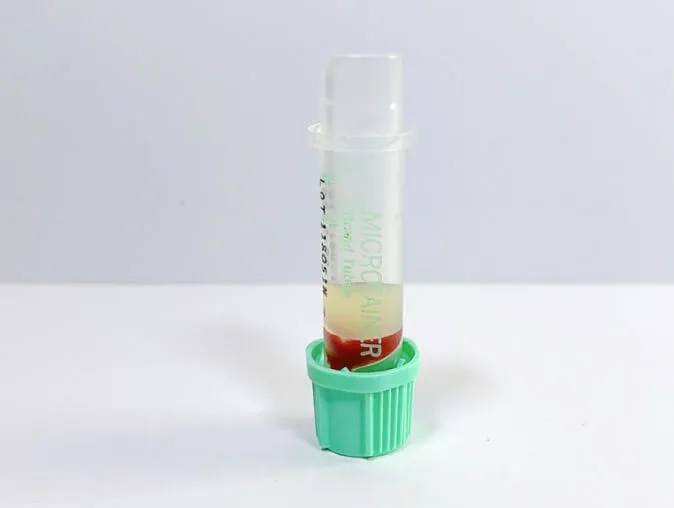
Blood in wrong end

Insert the blood in the larger end of the tube.

If your sample looks incorrect, please do not return your sample. Email support@imaware.health

Once your sample looks correct

Let’s walk you through some important steps before you can return your sample!

Ready to return my sample

Sample delivery

Returning your sample

A few steps are required before you can ship your sample back to the lab.

1

Replace cap and invert tube

Replace the cap and twist until your sample is secured. Invert the microtube 5-10 times to mix the contents and prevent clotting.

2

Secure your sample

Put your sample in the sample bag. Do not remove the contents of the bag.

3

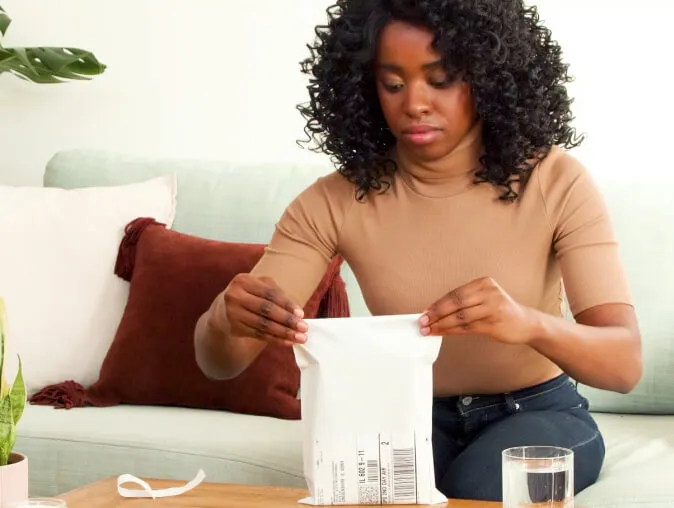
Put the sample bag in the return mailer

Once your sample is secured in the sample bag, place it in the return mailer and close it.

Drop it off at a mailbox today

Be sure to place your sample in the mailbox today for USPS to pick it up.
Shipping is already paid for.

Here's what you can expect:

Today

Drop off your sample the same day it was collected

In 3-5 business day

The lab will receive your sample

In seven business days

We will email you when your results are available

Find a USPS near me
Once you are finished, click here to return back to the dashboard.

Complete STI Test Sample Collection

For this test, you’ll need to collect 2 separate samples

1

Urine Sample

2

Blood Sample

Don’t worry - we’ll walk you through each of these step by step. Be sure to keep your imaware cube box; you will need it to ship your samples to the lab.
Let’s start by collecting a urine sample.

What's in your kit

Actual kit components may vary in shape, brand and color. Missing anything? Email support@imaware.health and we’ll get to the bottom of it.
Urine collection cup
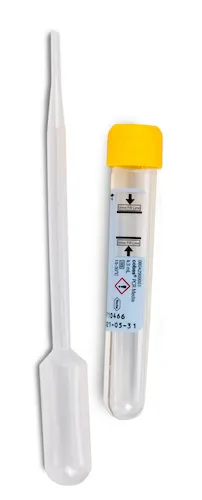
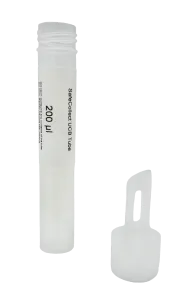
Transport tube and disposable pipette
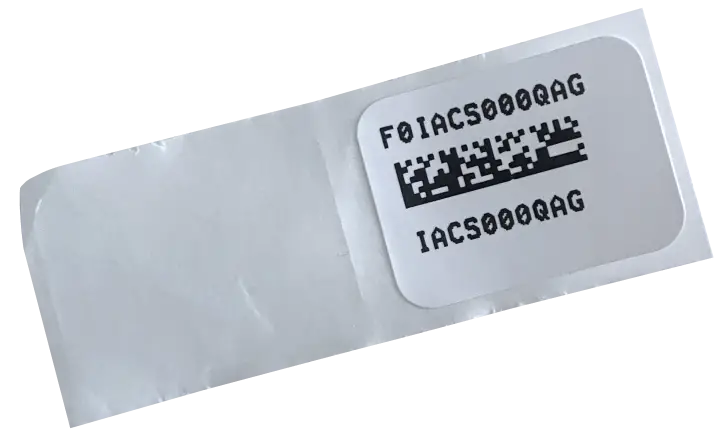
Kit ID sticker
Biohazard bag
Please do not remove absorbent material from the biohazard bag unless instructed to do so

Prepare to collect your sample

Please read all the instructions before collecting your sample.

Use the first urine of the day. If this isn't possible, don't urinate at least 1 hour prior to collection.

Do not cleanse the genital area prior to collecting the sample.

Wash your hands before collecting your sample.

Sample collection instructions

1

Unpack your kit

Unpack your kit and lay its components on the table in front of you. Open the sterile pouch containing the urine transport tube and disposable pipette.

2

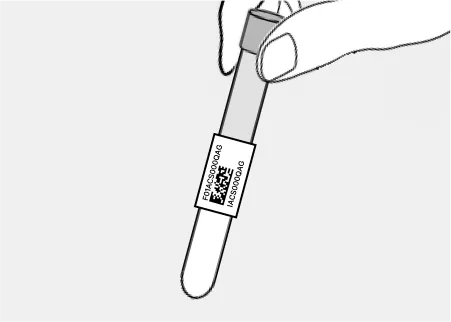
Apply the sticker on the urine tube

Before collecting the sample, find the kit ID sticker in the box. Apply the sticker on the urine transport tube without covering the fill lines. Note: the sticker label may be in the plastic bag containing the lancets.

3

Collect your sample

Collect about 10-50 ml of the initial urine stream in the urine collection cup, filling the cup about halfway. You do not need to write your information on the collection cup.

4

Transfer your sample

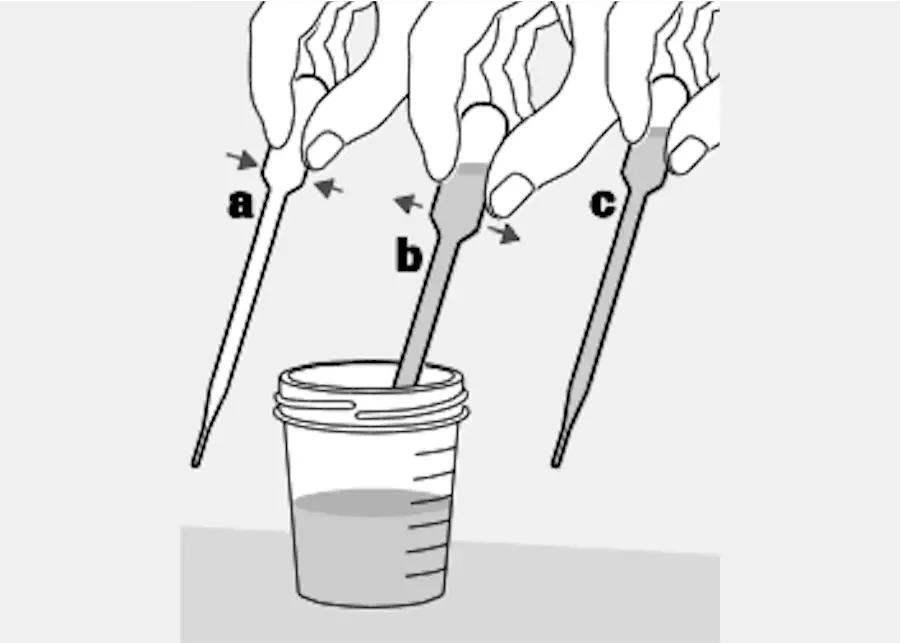
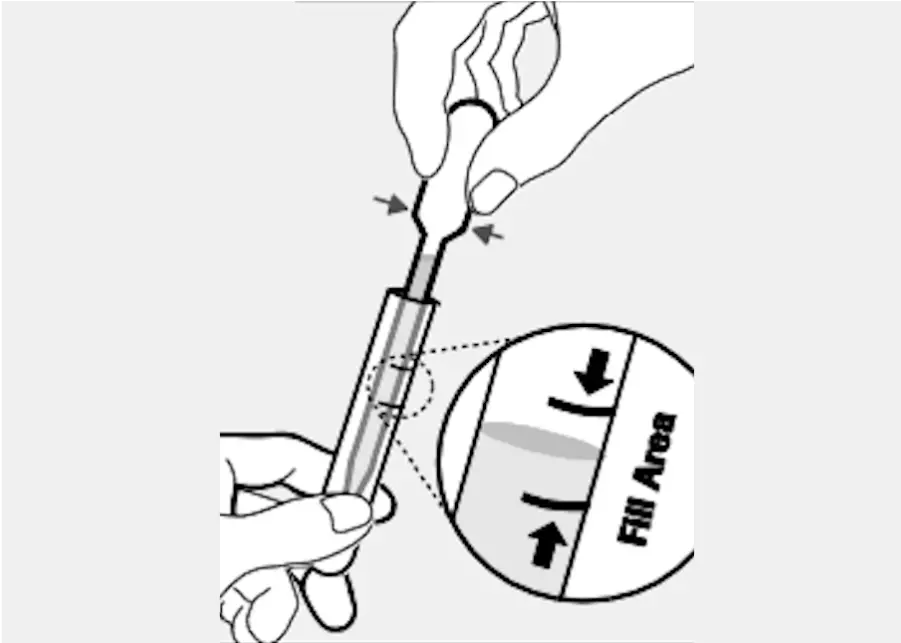
Use the disposable pipette to immediately transfer the urine into the transport tube.

The correct volume of urine has been added when the fluid level is between the two black lines on the tube label.

5

Close the transport tube

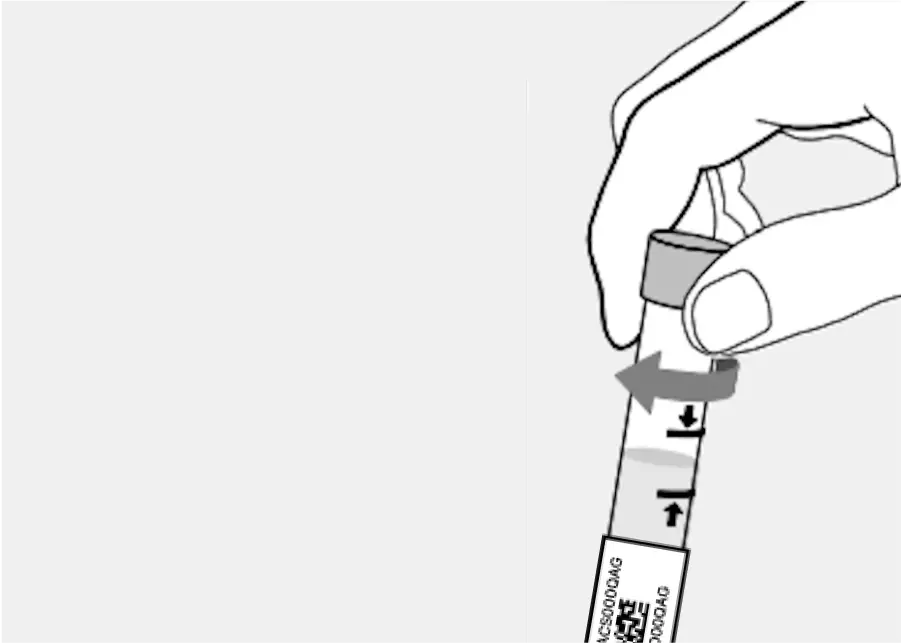
Tightly re-cap the transport tube. To avoid leakage, the tube must be closed securely.

6

Invert the transport tube

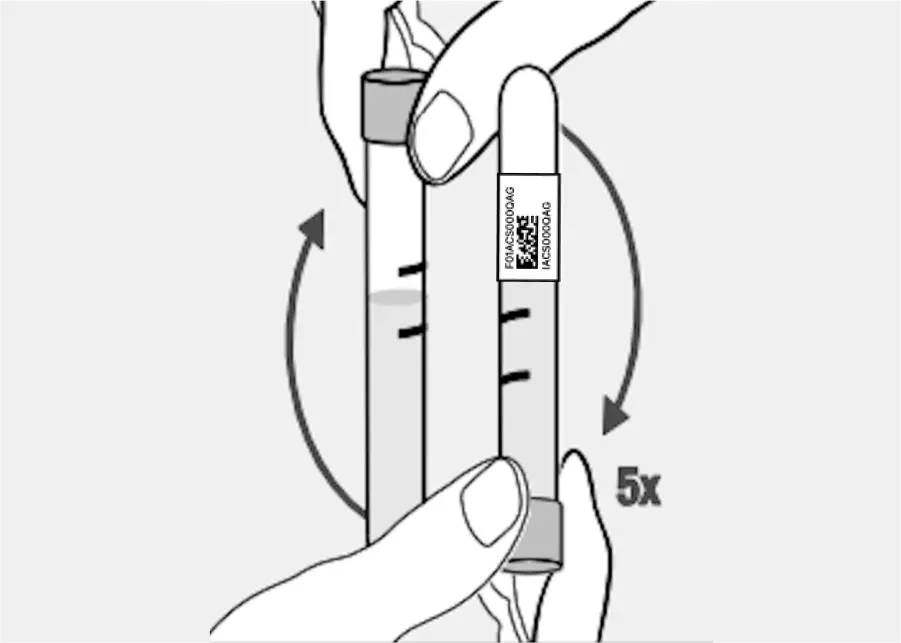
Invert the tube 5 times to mix your sample with the solution.

7

Place into biohazard bag

Without removing the absorbent material, place the closed transport tube containing your urine sample into the biohazard bag. Tightly seal the bag closed. Set this aside while you collect your blood sample.

8

Empty and discard the urine collection cup

Empty the leftover urine from the collection cup into the toilet. You're free to discard the cup; the urine transport tube in the sealed biohazard bag serves as your urine sample.

Here's what's next

Now we’ll walk you through the blood sample collection process.

Continue to blood sample collection

What's in your kit

Actual kit components may vary in shape, brand and color. Missing anything? Email support@imaware.health and we’ll get to the bottom of it.
Lancets
Collection device
Alcohol pads
Bandages
Sample bag

Sample collection instructions

1

Hydrate

Drink at least 16 oz (two full glasses) of water to help with blood flow.

2

Take off any rings

Remove any rings you’re wearing so that your blood vessels are unobstructed.

3

Get your heart rate up

Get your heart pumping to 100 beats per minute to improve circulation and deliver the volume you need.
Choose exercises suited to your abilities, or try these:

1 minute of squats
2 minutes of jumping jacks
2 minutes of high knees
4

Wash your hands

Wash your hands under water as hot as you can tolerate for 60 seconds to open up blood vessels.

5

Prepare to collect your sample

Without touching the strips on the collection device card, lay it on the table in front of you. Wipe your least calloused finger (usually your ring finger) with a provided alcohol wipe. Grasp the narrow end of a lancet. Twist and pull off the cap.

6

Stand while collecting your sample

Be sure you are standing over the table while collecting your sample to ensure optimal blood flow. If you are unable to stand, be sure your hand is above the collection device.

7

Collect your sample - A video of this process is included below.

  1. Place the tip of the lancet, which you’ve uncovered by removing the cap, firmly onto the middle-side of your fingertip. Press the lancet into your finger until you hear a click, pricking the skin.

  2. A blood droplet will begin to form. Wipe away the first drop of blood with a provided alcohol pad, avoiding contact with the puncture site as the alcohol may expedite sealing the wound.

  3. Add 3-5 ladybug-sized blood drops to each square indicated on the collection device, until each strip turns red to the indicated line. Having difficulty getting blood?

    • Massage your finger from its base to your second knuckle. If possible, avoid squeezing your finger; this will damage your blood cells and may compromise your sample. If squeezing is required, do so just above the base knuckle.
    • Use another lancet, if needed. Make sure the lancet is firmly pressed into the middle-side of the finger. Not in the middle, due to the nerves there, and not too close to the side because it’s more difficult to produce the amount of blood required there.
    • Wash your hands under hot water again and try a few more light exercises to get your heart rate back up.

Here is what to look for

Perfect sample

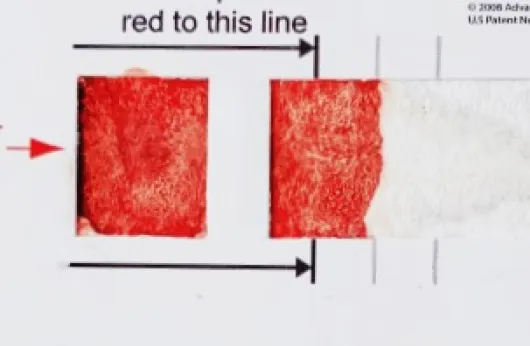
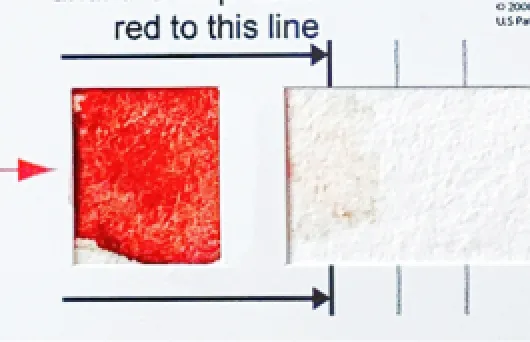
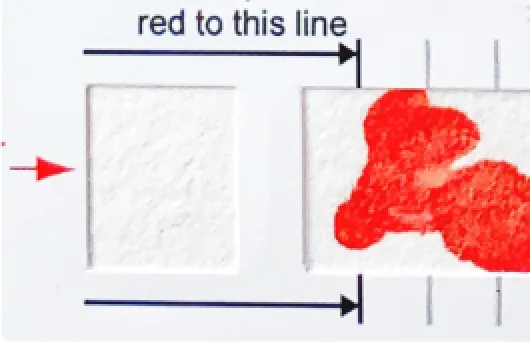
An ideal sample will be filled past the first line of each strip.

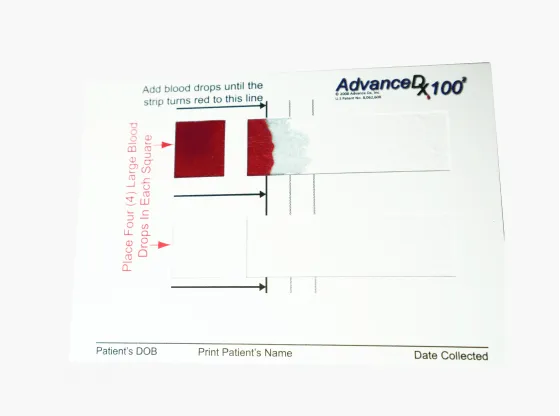
Not enough blood

Massage (don’t squeeze) a few more drops from the base of your finger, to your second knuckle. Use another lancet, if needed.

Blood in one strip

Add blood to the second square. Use another lancet, if needed.

Blood on wrong end

Do not return your sample.
Email support@imaware.health.

If your sample looks incorrect, please do not return your sample. Email support@imaware.health

Securing your sample

A few steps are required before you can ship your sample back to the lab.

1

Allow your sample to dry

Air dry for two hours on a flat surface, before placing in the blood sample return bag.

2

Place sample in blood sample return bag

Without removing the absorbent material, place the dried blood sample collection card into the blood sample return bag. Tightly seal the bag closed.

Returning your samples

Once both of your samples are ready, place them in the cube box then into the poly mailer bag and close it.

1

Place sample bags into cube box

Place both samples sealed inside their respective sample bags (dried blood sample collection card in its blood sample return bag and urine transport tube in its biohazard bag) into the cube box.

2

Place closed cube box in poly mailer bag

Place the closed cube box into the provided poly mailer (plastic shipping) bag. The pre-paid return shipping label and “UN3373" are included on the bag.

Drop it off at a mailbox today

Be sure to place your samples in the mailbox today for USPS to pick it up.
Shipping is already paid for.

Find a USPS near me

Here's what you can expect:

Today

Drop off your samples the same day they were collected

In 2-3 business days

The lab will receive your samples

In <7 business days

We will email you when your results are available

Once you receive your results

We will email you to book your free telehealth consult

During your consultation

Your provider may prescribe medication that will be filled at your requested pharmacy

You may now close this window

Preparing for the test

What's in your kit

Actual kit components may vary in shape, brand and color. Missing anything? Email support@imaware.health and we’ll get to the bottom of it.
Lancets
Collection device
Alcohol pads
Bandages
Sample bag
Return envelope

Here's what's next

We’ll walk you through every step of the sample collection process.

Continue to hydration

Preparing for the test

First, let’s get you hydrated

We want to make sure you are well hydrated prior to taking the test. This will help with blood flow when you collect your sample.

Please drink 16oz (or two full glasses) of water.

Now that you're hydrated

We’ll offer some hand warming tips to open up your capillaries.

Continue to hand warming

Preparing for the test

Now, let’s get your hands warmed up

Ensure your hands are warmed up as much as possible. Warm water will help open up your capillaries and get your blood flowing.

Run your hands under warm water for one minute.

Feel free to use our one-minute timer.

All warmed up? Good!

Next, you’ll get a quick exercise in to ensure your blood flow is as optimal as possible.

Continue to exercise

Preparing for the test

Time to get your blood flowing

Do some moderate exercise for two minutes. We recommend doing some quick jumping jacks, but do whatever exercise you are comfortable with. If you have a smart watch or a heart monitor, we recommend getting your heart rate above 100 beats per minute.

Try one (or more) of the following exercises:

1 minute of squats
2 minutes of jumping jacks
2 minutes of high knees

Feel free to use our two-minute timer.

You’re nearly there

Now it's time to prepare your finger for the sample collection.

Continue to preparation

Preparing for the test

Before you prick your finger

Let’s prepare to get the best results possible.

Note: kit components vary depending on test. Your sample collection card may have one or two boxes/strips

You will need to do the following:

  • We recommend using your “ring” finger as this finger is usually the least calloused.

  • Wipe your finger with the provided alcohol swab.


  • Without touching the collection material, remove the collection device and place it face up on the table.

  • Twist and remove the cap on your lancet. It is now ready to use.

Once you are ready

We’ll show you how to collect your sample.

I am ready to use the lancet

Taking the test

Now apply the lancet

Be patient and take your time! This process should only take a few minutes.

You will need to do the following:

  • Apply the lancet on either side of your finger.


  • Press the lancet into your finger until you hear a click.


  • Massage (don't squeeze) your finger to increase blood flow.

  • The blood goes in the top and bottom squares of the collection device. Fill the collection device to each first line indicated on the card.

Here is what to look for

Perfect sample

An ideal sample will be filled past the first line of each strip.

Not enough blood

Massage (don’t squeeze) a few more drops from the base of your finger, to your second knuckle. Use another lancet, if needed.

Blood in one strip

Add blood to the second square. Use another lancet, if needed.

Blood on wrong end

Do not return your sample.
Email support@imaware.health.

If your sample looks incorrect, please do not return your sample. Email support@imaware.health

Once your sample looks correct

Let’s walk you through some important steps before you can return your sample!

Ready to return my sample

Sample delivery

Returning your sample

A few steps are required before you can ship your sample back to the lab.

1

Allow your sample to dry

Air dry for two hours on a flat surface, before placing in the foil envelope.

2

Secure your sample

Put your sample in the sample bag. Do not remove the contents of the bag.

3

Put the sample bag in the return mailer

Once your sample is secured in the sample bag, place it in the return mailer and close it.

Drop it off at a mailbox today

Be sure to place your sample in the mailbox today for USPS to pick it up.
Shipping is already paid for.

Here's what you can expect:

Today

Drop off your sample the same day it was collected

In 3-5 business days

The lab will receive your sample

In seven business days

We will email you when your results are available

Find a USPS near me
You may now close this window

Preparing for the test

What's in your kit

Actual kit components may vary in shape, brand and color. Missing anything? Email support@imaware.health and we’ll get to the bottom of it.
Lancets
Collection device
Alcohol pads
Bandages
Sample bag
Return envelope

Here's what's next

We’ll walk you through every step of the sample collection process.

Continue to hydration

Preparing for the test

First, let’s get you hydrated

We want to make sure you are well hydrated prior to taking the test. This will help with blood flow when you collect your sample.

Please drink 16oz (or two full glasses) of water.

Now that you're hydrated

We’ll offer some hand warming tips to open up your capillaries.

Continue to hand warming

Preparing for the test

Now, let’s get your hands warmed up

Ensure your hands are warmed up as much as possible. Warm water will help open up your capillaries and get your blood flowing.

Run your hands under warm water for one minute.

Feel free to use our one-minute timer.

All warmed up? Good!

Next, you’ll get a quick exercise in to ensure your blood flow is as optimal as possible.

Continue to exercise

Preparing for the test

Time to get your blood flowing

Do some moderate exercise for two minutes. We recommend doing some quick jumping jacks, but do whatever exercise you are comfortable with. If you have a smart watch or a heart monitor, we recommend getting your heart rate above 100 beats per minute.

Try one (or more) of the following exercises:

1 minute of squats
2 minutes of jumping jacks
2 minutes of high knees

Feel free to use our two-minute timer.

You’re nearly there

Now it's time to prepare your finger for the sample collection.

Continue to preparation

Preparing for the test

Before you prick your finger

Let’s prepare to get the best results possible.

Note: kit components vary depending on test. Your sample collection card may have one or two boxes/strips

You will need to do the following:

  • We recommend using your “ring” finger as this finger is usually the least calloused.

  • Wipe your finger with the provided alcohol swab.


  • Without touching the collection material, remove the collection device and place it face up on the table.

  • Twist and remove the cap on your lancet. It is now ready to use.

Once you are ready

We’ll show you how to collect your sample.

I am ready to use the lancet

Taking the test

Now apply the lancet

Be patient and take your time! This process should only take a few minutes.

You will need to do the following:

  • Apply the lancet on either side of your finger.


  • Press the lancet into your finger until you hear a click.


  • Massage (don't squeeze) your finger to increase blood flow.

  • Add blood to the square indicated on the collection device. Fill the collection device to the first line indicated on the strip.

Here is what to look for

Perfect sample

An ideal sample will be filled past the first line of each strip.

Not enough blood

Massage (don’t squeeze) a few more drops from the base of your finger to your second knuckle. Use another lancet, if needed.

Blood on wrong end

Do not return your sample.
Email support@imaware.health.

If your sample looks incorrect, please do not return your sample. Email support@imaware.health

Once your sample looks correct

Let’s walk you through some important steps before you can return your sample!

Ready to return my sample

Sample delivery

Returning your sample

A few steps are required before you can ship your sample back to the lab.

1

Allow your sample to dry

Air dry for two hours on a flat surface, before placing in the foil envelope.

2

Secure your sample

Put your sample in the sample bag. Do not remove the contents of the bag.

3

Put the sample bag in the return mailer

Once your sample is secured in the sample bag, place it in the return mailer and close it.

Drop it off at a mailbox today

Be sure to place your sample in the mailbox today for USPS to pick it up.
Shipping is already paid for.

Here's what you can expect:

Today

Drop off your sample the same day it was collected

In 3-5 business days

The lab will receive your sample

In seven business days

We will email you when your results are available

Find a USPS near me
You may now close this window

Preparing for the test

What's in your kit

Actual kit components may vary in shape, brand and color. Missing anything? Email support@imaware.health and we’ll get to the bottom of it.
Lancet (x4)
Microtube (x1)
Alcohol pad (x4)
Bandage (x4)
Biohazard bag (x1)
Sample bag (x1)
Return envelope (x1)

Here's what's next

We’ll walk you through every step of the sample collection process.

Continue to hydration

Preparing for the test

First, let’s get you hydrated

We want to make sure you are well hydrated prior to taking the test. This will help with blood flow when you collect your sample.

Please drink 16oz (or two full glasses) of water.

Now that you're hydrated

We’ll offer some hand warming tips to open up your capillaries.

Continue to hand warming

Preparing for the test

Now, let’s get your hands warmed up

Ensure your hands are warmed up as much as possible. Warm water will help open up your capillaries and get your blood flowing.

Run your hands under warm water for one minute.

Feel free to use our one-minute timer.

All warmed up? Good!

Next, you’ll get a quick exercise in to ensure your blood flow is as optimal as possible.

Continue to exercise

Preparing for the test

Time to get your blood flowing

Do some moderate exercise for two minutes. We recommend doing some quick jumping jacks, but do whatever exercise you are comfortable with. If you have a smart watch or a heart monitor, we recommend getting your heart rate above 100 beats per minute.

Try one (or more) of the following exercises:

1 minute of squats
2 minutes of jumping jacks
2 minutes of high knees

Feel free to use our two-minute timer.

You’re nearly there

Now it's time to prepare your finger for the sample collection.

Continue to preparation

Preparing for the test

Before you prick your finger

Let’s prepare to get the best results possible.

You will need to do the following:

  • We recommend using your “ring” finger as this finger is usually the least calloused.

  • Wipe your finger with the provided alcohol swab.


  • Remove the microtube cap.


  • Twist and remove the cap on your lancet. It is now ready to use.

Once you are ready

We’ll show you how to collect your sample.

I am ready to use the lancet

Taking the test

Now apply the lancet

Be patient and take your time! This process should only take a few minutes.

You will need to do the following:

  • Apply the lancet on either side of your finger.


  • Press the lancet into your finger until you hear a click.


  • Massage (don't squeeze) your finger to increase blood flow.

Here is what to look for

Your test requires 400 microliters of blood (fill to the line indicated on your microtube)

Perfect sample

An ideal sample will be filled to the 400 microliter line.

Not enough blood

Massage (don’t squeeze) a few more drops from the base of your finger to your second knuckle. Use another lancet, if needed.

Blood in wrong end

Insert the blood in the larger end of the tube.

If your sample looks incorrect, please do not return your sample. Email support@imaware.health

Once your sample looks correct

Let’s walk you through some important steps before you can return your sample!

Ready to return my sample

Sample delivery

Returning your sample

A few steps are required before you can ship your sample back to the lab.

1

Replace cap and invert tube

Replace the cap and twist until your sample is secured. Invert the microtube 5-10 times to mix the contents and prevent clotting.

2

Secure your sample

Put your sample in the sample bag. Do not remove the contents of the bag.

3

Put the sample bag in the return mailer

Once your sample is secured in the sample bag, place it in the return mailer and close it.

Drop it off at a mailbox today

Be sure to place your sample in the mailbox today for USPS to pick it up.
Shipping is already paid for.

Here's what you can expect:

Today

Drop off your sample the same day it was collected

In 3-5 business day

The lab will receive your sample

In seven business days

We will email you when your results are available

Find a USPS near me
Once you are finished, click here to return back to the dashboard.

Prepare for sample collection

Collecting a blood sample at home is easy when you’re prepared. Follow these steps to get a good sample:

Lay out your kit

Sample collection is fast, so make sure you have everything ready to go in front of you.

Take off your rings

Your blood vessels need to be unobstructed, so please remove any rings you’re wearing.

Drink lots of water

Drink at least one large glass of water to ensure you collect the volume of blood required.

Get your blood flowing

Get your heart pumping to 100 beats per minute to increase blood flow and deliver the volume you need.

Choose exercises suited to your abilities, or try these:

1 minute of squats
2 minutes of jumping jacks
2 minutes of high knees

Wash your hands under water as hot as you can tolerate for 60 seconds

Hot water opens the blood vessels in your hands, making it easy to draw out enough blood.

Have you followed the steps above? When all the boxes are checked, you're ready to continue.

Collect your sample

Now that you’re ready for the test, it’s time to take it! Follow the video below to collect your sample.

Some important do’s and don’ts

Having trouble? These tips will help:

Do's

Point your finger down while massaging your palm.
Wipe the insertion point after every 2-3 drops to keep it open.
Use a second lancet, if needed.

Dont's

Squeeze your fingertip; this will damage your blood cells and may compromise your sample.
Get frustrated; another lancet is there if you need it.

What your sample should look like:

A sample collection device
The collection device is filled slightly above the 100 line.

What not to do:

A sample collection device
The collection device was filled from the wrong end.
Please contact

Here’s what your sample should look like:

Each spot is filled in

Place 1 large drop of blood into each circle, until completely full and saturated.

Allow time to dry

Your sample will take at least 30 minutes until visibly dry.

A sample collection device

Here’s what your sample should look like:

Each spot is filled in

Place 1 large drop of blood into each circle, until completely full and saturated.

Allow time to dry

Your sample will take at least 30 minutes until visibly dry.

A sample collection device

What not to do:

A sample collection device
Not enough blood, add more drops
A sample collection device
Still not enough blood, add another drop
A sample collection device
Too much blood
Please contact

What not to do:

A sample collection device
Not enough blood, add more drops
A sample collection device
Still not enough blood, add another drop
A sample collection device
Too much blood
Please contact

Here’s what your sample should look like:

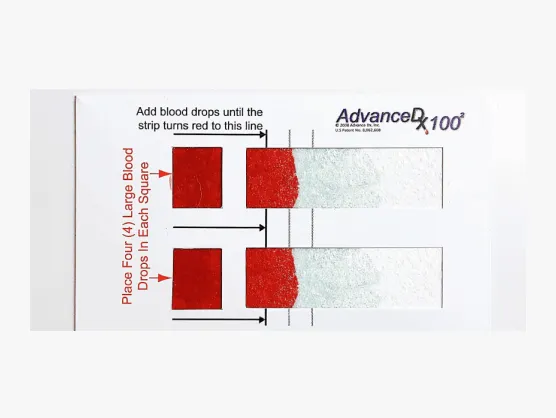
Both strips turn red past the first line

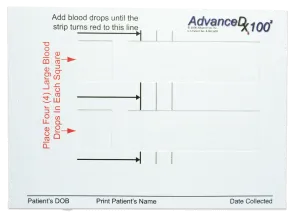
Place 4 blood drops into the left square until it migrates past the first line indicated.

Allow time to dry

Your sample will take at least 30 minutes until visibly dry.

A sample collection device

What not to do:

A sample collection device
Not enough blood, add more drops
A sample collection device
Still not enough blood, add another drop
A sample collection device
Blood placed in the wrong area
Please contact

Here’s what your sample should look like:

Strip turns red past the first line

Place 4 blood drops into the left square until it migrates past the first line indicated.

Allow time to dry

Your sample will take at least 30 minutes until visibly dry.

A sample collection device

What not to do:

A sample collection device
Not enough blood, add more drops
A sample collection device
Still not enough blood, add another drop
A sample collection device
Blood placed in the wrong area
Please contact

Here’s what your sample should look like:

A sample collection device

Forms a tail

Add blood to the center of the device until it forms a tail.

Visibly dry

Your sample should be visibly dry within 5-10 minutes.

What not to do:

A sample collection device
Not enough blood, add more drops
A sample collection device
Still not enough blood, add another drop
A sample collection device
Too much blood, not dry
Please contact

What your sample should look like:

A sample collection device
The collection device is filled to the 400 line or a little bit over it.
The collection device is filled a little bit over the 400 line.

What not to do:

A sample collection device
The collection device was filled at the wrong end. Please contact support@imaware.health
A sample collection device
Not enough blood. Add a few more drops.

Having difficulty getting blood?

Wash your hands under hot water again and try a few more light exercises to get your heart rate back up.

Go back to Prepare

Before you move on to the next step, the following boxes must be checked.

Drop off your package

To keep your sample in top form, return your package to your nearest USPS location as soon as possible. The sooner you ship it back, the better.

Find your closest USPS location
Thank you! Your submission has been received!
Oops! Something went wrong while submitting the form.

Collection Instructions

What's in your kit

Actual kit components may vary in shape, brand and color. Missing anything? Email support@imaware.health and we’ll get to the bottom of it.
Biohazard bag
(x1)
Please do not remove contents from the biohazard bag unless instructed to do so
Transport tube and cap
(x1)
Please do not remove
Return envelope
(x1)
Urine collection cup
(x1)
Disposable pipette
(x1)
Please do not remove

Sample collection instructions

Please read all instructions before collecting your sample.
Wash your hands before collecting your sample. Use the first urine of the day. If first morning urine isn’t possible, do not urinate for at least 1 hour prior to collection. Do not cleanse the genital area prior to collecting the sample.

1

Collect your sample

Do not exceed .5 oz (15 ml) of initial urine stream (not midstream urine) in the urine collection cup.
Volumes over .5 oz (15 ml) may result in dilution, which reduces the sensitivity of the test. You do not need to write your information on the collection cup.

2

Transfer your sample

Remove only the disposable pipette, transport tube and cap from the biohazard bag.
Do not place the cap on the transport tube or twist the cap closed prior to adding your sample. If you have already done so, do not return your sample. Contact
support@imaware.health.
Use the disposable pipette to transfer urine from the collection cup to the transport tube (without piercing the foil in the tube). The fill line - 2ml - is indicated by an arrow on the tube. Try not to overfill the tube.

3

Close the transport tube

Place the cap on the transport tube and twist to close. This will pierce the foil to mix its contents. To avoid leakage, the tube must be closed securely.

4

Invert the transport tube

Invert the tube 5 times to mix your sample with the solution.

Ship your sample

1

Place sample in biohazard bag

Without removing the contents of the bag, place the tube containing your sample into the biohazard bag. Tightly seal the bag closed.

2

Secure your sample

Place the biohazard bag containing your sample in the sample bag.

3

Put the box in the return envelope

Once your sample is secured in the biohazard bag and sample bag, place it in the return mailer and close it.

Drop it off at a mailbox today

Be sure to place your sample in the mailbox today for USPS to pick it up.
Shipping is already paid for.

Find USPS near me

Here's what you can expect

Today

Drop off your sample the same day it was collected

In 3-5 business days

The lab will receive your sample

In seven business days

We will email you when your results are available

Sample Collection Instructions

What's in your kit

Actual kit components may vary in shape, brand and color. Missing anything? Email support@imaware.health and we’ll get to the bottom of it.

Lancets
Collection device
Alcohol pads
Bandages
Sample bag
Return envelope

Sample collection instructions

1

Hydrate

Drink 16 oz, or two full glasses, of water to help with blood flow.

2

Wash your hands

Wash your hands under warm water for one minute to help open up your capillaries.

3

Prepare to collect your sample

Without touching the collection material, remove your collection device and lay it on the table in front of you. Wipe your least calloused finger (usually ring finger) with a provided alcohol wipe. Twist and remove the cap on your lancet.

4

Stand while collecting your sample

Be sure you are standing over the table while collecting your sample to ensure optimal blood flow. If you are unable to stand, be sure your hand is above the collection device.

5

Collect your sample

A video of this process is included below. Apply the lancet to either side of your finger. Press the lancet into your finger until you hear a click. Massage (don’t squeeze) your finger as needed to increase blood flow. Add blood to the square indicated on the collection device. Fill the device to the first red line indicated on the card.

Note: kit components vary depending on test. Your sample collection card may have one or two boxes/strips

Here is what to look for

Perfect sample

An ideal sample will be filled past the first line indicated on the card.

Not enough blood

Massage (don’t squeeze) a few more drops from the base of your finger to your second knuckle. Use another lancet, if needed.

Blood on wrong end

Do not return your sample.
Email support@imaware.health.

If your sample looks incorrect, please do not return your sample. Email support@imaware.health

Returning your sample

A few steps are required before you can ship your sample back to the lab.

1

Allow your sample to dry

Air dry for two hours on a flat surface, before placing in the foil envelope.

2

Secure your sample

Put your sample in the sample bag. Do not remove the contents of the bag.

3

Put the sample bag in the return mailer

Once your sample is secured in the sample bag, place it in the return mailer and close it.

Drop it off at a mailbox today

Be sure to place your sample in the mailbox today for USPS to pick it up.
Shipping is already paid for.

Find USPS near me

Here's what you can expect:

Today

Drop off your sample the same day it was collected

In 3-5 business days

The lab will receive your sample

In seven business days

We will email you when your results are available

You may now close this window

Sample Collection Instructions

What's in your kit

Actual kit components may vary in shape, brand and color. Missing anything? Email support@imaware.health and we’ll get to the bottom of it.

Lancets
Collection device
Alcohol pads
Bandages
Sample bag
Return envelope

Sample collection instructions

1

Hydrate

Drink 16 oz, or two full glasses, of water to help with blood flow.

2

Wash your hands

Wash your hands under warm water for one minute to help open up your capillaries.

3

Prepare to collect your sample

Without touching the collection material, remove your collection device and lay it on the table in front of you. Wipe your least calloused finger (usually ring finger) with a provided alcohol wipe. Twist and remove the cap on your lancet.

4

Stand while collecting your sample

Be sure you are standing over the table while collecting your sample to ensure optimal blood flow. If you are unable to stand, be sure your hand is above the collection device.

5

Collect your sample

A video of this process is included below. Apply the lancet to either side of your finger. Press the lancet into your finger until you hear a click. Massage (don’t squeeze) your finger to increase blood flow. Add blood to each square indicated on the collection device. Fill the device to each first red line indicated on the card.

Note: kit components vary depending on test. Your sample collection card may have one or two boxes/strips

Here is what to look for

Perfect sample

An ideal sample will be filled past the first line of each strip.

Not enough blood

Massage (don’t squeeze) a few more drops from the base of your finger, to your second knuckle. Use another lancet, if needed.

Blood in one strip

Add blood to the second square. Use another lancet, if needed.

Blood on wrong end

Do not return your sample.
Email support@imaware.health.

If your sample looks incorrect, please do not return your sample. Email support@imaware.health

Returning your sample

A few steps are required before you can ship your sample back to the lab.

1

Allow your sample to dry

Air dry for two hours on a flat surface, before placing in the foil envelope.

2

Secure your sample

Put your sample in the sample bag. Do not remove the contents of the bag.

3

Put the sample bag in the return mailer

Once your sample is secured in the sample bag, place it in the return mailer and close it.

Drop it off at a mailbox today

Be sure to place your sample in the mailbox today for USPS to pick it up.
Shipping is already paid for.

Find USPS near me

Here's what you can expect:

Today

Drop off your sample the same day it was collected

In 3-5 business days

The lab will receive your sample

In seven business days

We will email you when your results are available

You may now close this window

Sample Collection Instructions

What's in your kit

Actual kit components may vary in shape, brand and color. Missing anything? Email care@femmistry.com and we’ll get to the bottom of it.

Lancet (x3)
Collection device (x1)
Alcohol pad (x3)
Bandage (x3)
Sample bag (x1)
Return envelope (x1)

Sample collection instructions

1

Hydrate

Drink 16 oz, or two full glasses, of water to help with blood flow.

2

Wash your hands

Wash your hands under warm water for one minute to help open up your capillaries.

3

Prepare to collect your sample

Without touching the collection material, remove your collection device and lay it on the table in front of you. Wipe your least calloused finger (usually ring finger) with a provided alcohol wipe. Twist and remove the cap on your lancet.

4

Stand while collecting your sample

Be sure you are standing over the table while collecting your sample to ensure optimal blood flow. If you are unable to stand, be sure your hand is above the collection device.

5

Collect your sample

A video of this process is included below. Apply the lancet to either side of your finger. Press the lancet into your finger until you hear a click. Massage (don’t squeeze) your finger to increase blood flow. Add blood to each square indicated on the collection device. Fill the device to each first red line indicated on the card.

Here is what to look for

Perfect sample

An ideal sample will be filled past the first line of each strip.

Not enough blood

Massage (don’t squeeze) a few more drops from the base of your finger, to your second knuckle. Use another lancet, if needed.

Blood in one strip

Add blood to the second square. Use another lancet, if needed.

Blood on wrong end

Do not return your sample.
Email care@femmistry.com.

If your sample looks incorrect, please do not return your sample. Email care@femmistry.com

Returning your sample

A few steps are required before you can ship your sample back to the lab.

1

Allow your sample to dry

Air dry for two hours on a flat surface, before placing in the foil envelope.

2

Secure your sample

Put your sample in the sample bag. Do not remove the contents of the bag.

3

Put the sample bag in the return mailer

Once your sample is secured in the sample bag, place it in the return mailer and close it.

Drop it off at a mailbox today

Be sure to place your sample in the mailbox today for USPS to pick it up.
Shipping is already paid for.

Find USPS near me

Here's what you can expect:

Today

Drop off your sample the same day it was collected

In 3-5 business days

The lab will receive your sample

In seven business days

We will email you when your results are available

You may now close this window